10 Things Long Island Builders and Architects Could Do to Prepare for Solar
May 16, 2017
by EmPower Solar


AS TRENDS POINT TOWARDS A MORE RENEWABLY SOURCED FUTURE, ITS IMPORTANT TO CONSIDER HOW TO PLAN OUR BUILDINGS “SOLAR READY” TO INCREASE EFFICIENCY AND BOOST PRODUCTION IN NEW YORK CITY.
This content is a recap from a recent event at the Molloy Institute of Sustainability, where builders, local policy makers, industry professionals, and community members came together to learn how to better prepare New York for solar energy.
1.Rooftop orientation
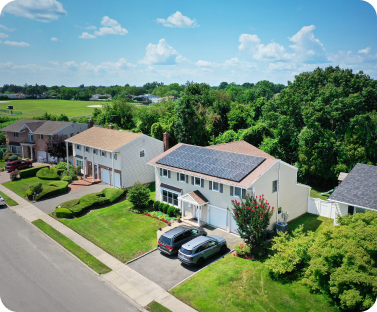
Solar production is optimized on true south facing roofs, which should ideally be 180 degrees with a 33 degree pitch, or close to it. Design should also maintain a level roof space free of obstructions, dormers, and peaks.
2. Continuous roof spaces
For typical energy use of about 12,000 kWh per year, the homeowner would need an 8-10 kW system. This would require about 600 to 800 square feet of roof space. To make this achievable it’s especially important to group vent stacks, chimneys, and skylights near ridges, gutters, on northern surfaces.
3. Structural integrity
It is important for the installation and the integrity of the roof that you build a structure which is prepared for additional weight of the panels. Keeping solar in mind from the start can create a more streamlined installation later on. Ways to do this are to preinstall anchors in a permanent fashion to reduce roof penetrations. For pitched roofs, assume an additional 5 PSF in addition to existing structure. Install large rafters and a knee wall for spans larger than 18 feet.
4. Conduit specifications
Install EMT or PVC Conduit from the attic underneath where each solar array is to be installed. Conduit run from solar array shall have no more than 3-90 bends, anymore than that should have accessible pull points. Allow access for roof penetration during PV array installation to continue the conduit run to an exterior junction box. Identify conduit with labels stating “ Solar Ready” or “Future PV Conduit.”
EV considerations
When building single family homes, the electrical conduit between the main breaker box and a location for an EV charger should be incorporated in the new home when it is built. conduit in place makes it much easier to add the wiring and actual charger if and when one is needed. Otherwise adding that circuitry to an already built house is much more expensive. In the case of multi-family buildings, some fraction of the parking spots should be similarly equipped, or even have chargers in place ready for use.
5. Surface panel spacing
Allow a minimum of 3’ wide by 4’ high space for PV equipment components. Optimal location for the equipment area is adjacent to the main service panel and utility meter.
6. Cables, Wiring, and Attachments
It’s always good idea to consult a solar integrator. Keep in mind the location of the inverter, conduit, and pipe runs. Leave room in electric panel for back-fed breakers, and leave space adjacent to panel for additional panel. To protect wiring and panel attachments install squirrel guards, and keep wiring neat underneath the panels.
7. Know the proper materials, and best-practices for each.
Metal Seam Roofing is a very solar friendly material. Attachments can be made using S-5 or seam clamps. Conduit runs should be pre-run to the exterior and capped and flashed during roof construction.
Asphalt Shingle is the most common residential roof surface. Attachment points will be flashed and sealed at time of PV array installation. Only use asphalt shingle for roof surfaces pitched 14 degrees or steeper.
Tile Roof PV array attachments can be made on tile roof surfaces. Additional material and labor will be needed, and conduit should be pre-run capped and sealed during construction.
Rolled Asphalt or Rubber is also solar-friendly material, and is recommended on any pitches shallower than 14 degrees to prevent leaking. The roof might require additional equipment such as standoffs and pitch pockets.
8. Consult local codes for buildings, electricity, and fire department requirements.
9. Install load monitoring systems to understand usage habits, and to make the most of net-metering benefits.
10. Consider what the home’s backup power source will be and prepare to design for “battery ready” capabilities.
Something to consider is radiant heating systems that use natural gas. It’s also important to include a critical loads panel, energy efficient lighting, appliances, and general equipment.
Say goodbye to high-energy bills and hello to worry-free solar

Say goodbye to high-energy bills and hello to worry-free solar
About the Author
EmPower Solar develops, engineers, installs, and services solar and battery systems for residential and commercial clients. Since 2003, EmPower Solar has empowered thousands of New York homeowners and businesses with 47 megawatts of distributed solar. Its vision is to create a new energy paradigm powered by clean, renewable energy for a more prosperous, healthy, and civil world. The company culture is defined by the EmPowering Way, which results in consistent 5-star customer service reviews. For more information visit empower-solar.com.